Butterscotch Chocolate Bark Bars

These are Halloween butterscotch and chocolate bark bars. Most chocolate bark is just poured onto parchment and then studded with dried fruit, nuts and all kinds of candy, depending on the occasion.

Butterscoth bark pile

I found some great chocolate moulds with bark patterns in them on Amazon and they are just the right size for making individual chocolate bars. The moulds are made from silicone, so getting the bars out couldn’t be easier.

Halloween bark butterscotch

These bars are made with old fashioned butterscotch candy with a coating of chocolate and decorated for Halloween.

It really is best to use a candy thermometer for this recipe as the sugar needs to be heated to the soft and hard crack stage.

If you are not using moulds, line a tin with oiled foil. When the candy is poured into the tin, leave it to cool for 5 minutes before scoring into squares, or break with a toffee hammer when cold.

butterscotch bark1

Ingredients:
450g sugar
150ml water
85g golden syrup
1tsp lemon juice
¼tsp cream of tartar
130g butter
1tsp vanilla extract
100g dark chocolate
100g milk chocolate
Decorations – I have used candy corn, sugar eyes, bones and Halloween sprinkles

butterscotch bark1

Method:
Place the sugar, water, syrup and lemon juice in a heavy based pan over a medium heat until almost boiling.

Remove from the heat and stir in the cream of tartar.

Place back on the heat and take it up to the soft crack stage (132°C/270°F).

Remove from the heat and add the butter and vanilla, mixing in well.

Return to the heat and take it up to the hard crack stage (146°C-154°C/295°C/309°F)

Take off the heat and immediately pour into the moulds, or the prepared tin. Leave to cool completely.

butterscotch bark single

To decorate, melt the chocolate in the microwave until almost melted, stirring well so the residual heat melts it completely.

butterscotch bark closeup

Spoon over a coating of the chocolate, before decorating with your chosen edibles.

butterscotch bark closeup2

Fairground Rocky Road

Last Saturday night, we took the children to the 765th Ilkeston Charter Fair. It’s an annual tradition that we do every year. My parents used to take me when I was little and now I take my children.

Aside from the rides, thumping music and all the sounds and smells of the fair, we usually come back with an armful of fair goodies. This year was no different and one of our favourite things is honeycomb!

Rocky road single

Once they had munched half the bag, I decided to put the rest in a batch of rocky road. I’ve never actually made rocky road before, but Danielle at work is a big fan and I thought I would make a batch and save her a piece. When I say save a piece, what I mean is hide a piece before the boys got in there first!

There is no baking, it’s just a job of breaking up the biscuits and honeycomb, melting the chocolate and pressing into a lined tin. Everyone agreed that it was the best rocky road they had tasted, which is always a good sign!

Rocky Road stack

Prepare your dish or tin by lining with parchment. I used a lasagne dish measuring 30cm x 19.5cm

Ingredients:
Half a bag of honeycomb, chopped up Crunchy bars would also work
A 300g pack of milk chocolate biscuits (minus 2 or three that my son snaffled) I used McVities
A few handfuls of pink and white mini marshmallows
1 large squidge of golden syrup (approximately ½ cup)
300g good quality 70% dark chocolate
200g good quality milk chocolate
100g good quality white chocolate

Rocky Road closeup

Method:
In a large bowl, break up the honeycomb pieces, I used the end of a rolling pin to crack them into smaller sized rubble. I then broke up the biscuits using my hands. I didn’t bash them as I didn’t want it to be overly crumby! Finally, toss in the marshmallows.

For the chocolate, break up the milk and dark chocolate pieces and melt them in the microwave, or in a bowl over simmering water. I melt the chocolate until there are a few lumps left and then stir until the residual heat melts the rest.

Leave to cool for a minute or two before pouring over the rubble and mixing thoroughly.

Press into the prepared tin.

Melt the white chocolate and then drizzle over the rocky road and take a spoon to do a little marbling.

Leave in the fridge to chill before cutting into squares. This is very indulgent, so keep the squares fairly small!

Rocky Road1

This is a really good sweet treat to give in a cellophane bag as a gift or to take to a bake sale

Roasted Acorn Squash Quiche with Chestnuts, Bacon and Stilton

There are so many lovely pumpkins and squashes around at the moment and I love trying as many as possible.

Squash, bacon & Stilton Quiche

I think my favourite way of cooking squash is to roast it in the oven. Either simply with olive oil, salt and pepper, or adding spices and chilli.

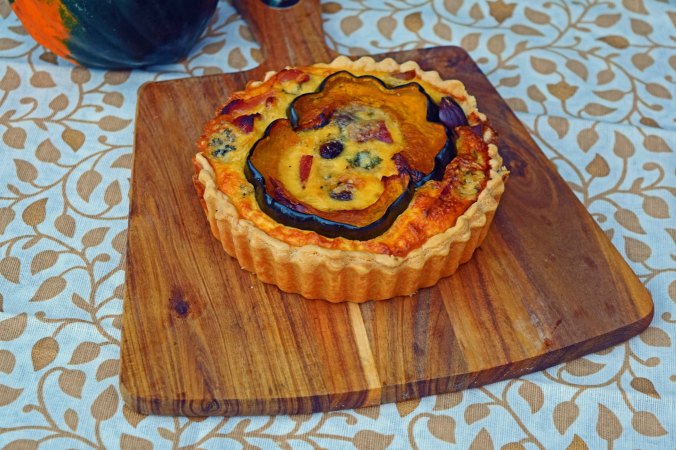
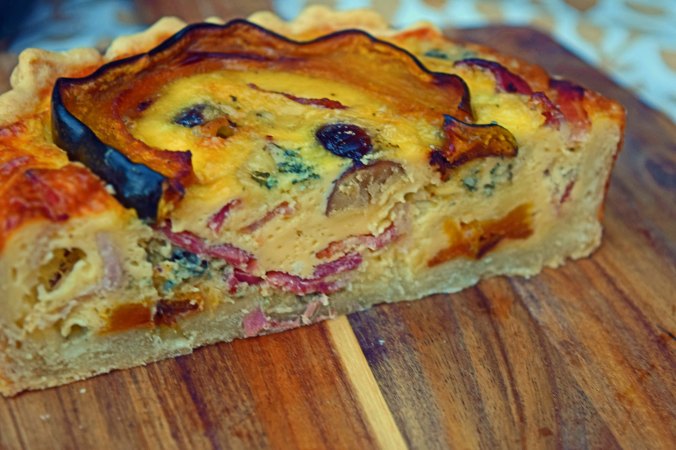
These quiches contain roasted Acorn squash and I have left the skins on as they are fairly thin and roast up really nicely. Sometimes the older and bigger squashes have very thick skins and I tend to peel those.

Along with the squash, these quiches have crispy, smoked bacon, chestnuts and plenty of Stilton cheese, so lots of big flavours going on. I don’t add any salt to the eggs and cream as I think the bacon and Stilton add enough salt of their own, but this is my preference.

This recipe makes four individual quiches. I used 12.5cm, deep fill tartlet tins with removable bases, but you can easily make one large one.

Squash, bacon & Stilton Quiche2

Crust:
400g all-purpose flour
1 pinch of salt
230g very cold butter cut into cubes and chilled again
95ml iced water

Ingredients:
2 Acorn squashes, topped, tailed, halved and seeds removed
5 extra-large eggs
¾ pint double/heavy cream
300g Blue Stilton cheese broken in to large crumbles
320g Good quality smoked streaky bacon
180g pack of prepared sweet chestnuts, roughly broken up
Salt and freshly ground black pepper
1 tbs olive oil

Method:
Add the flour, salt and butter to a food processor fitted with the steel blade. Pulse until the butter is the size of small peas, or rough breadcrumbs. Add the iced water a little a time while pulsing the food processor, just until the dough just comes together. You might not need all of the water.

Form the dough into a disc and wrap in plastic. Leave to chill for 30 minutes.

On a floured board, roll out the pastry and then, taking care not to stretch the dough, line the tins with the pastry, re-rolling until all the tins are done. Place the pastry cases in the fridge and chill for another 30 minutes.

Squash, bacon & Stilton Quiche3

Preheat the oven to 180°C/350°F

Line the pastry cases with parchment paper or foil, fill with baking beans and place in the oven to blind bake for 15-20 minutes. Take the pastry shells out of the oven, remove the paper and beans and then return to the oven for further 5 minutes or until the pastry feels dry. Leave to cool before adding the filling.

Squash, bacon & Stilton Quiche1

Pre-heat the oven to 220°C/430°F

Cut the halved squashes into slices, just over 1cm thick and rub them all over in 1tbs olive oil with 1tsp of salt and plenty of freshly ground black pepper. Roast them in the oven until the squash is tender and catching on the edges. This will take around 20-25 minutes, depending on how thick the slices are.

While the squash is roasting, fry the bacon until the fat renders out and it is crisp, set aside on kitchen paper to cool before chopping into small, bite-sized pieces.

Lower the oven to 180°C/360°F

Place the blind baked pastry shells on a baking tray to make transporting to the oven easier.

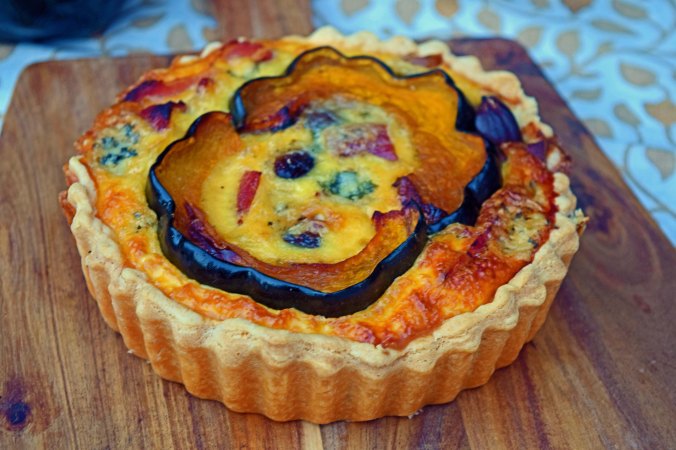
Place a couple of slices of squash in the bases of each quiche, then layer over the bacon, chestnuts and chunks of Stilton cheese. Divide the filling between the 4 cases and top each one with another couple of slices of the squash.

Whisk the eggs, cream together with more freshly ground black pepper and pour over the quiches until each one is full.

Taking care not to spill, place the tray with the quiches in the oven and bake for around 30 minutes or until just set in the middle. The quiche will be nicely puffed and golden brown and will smell very good indeed.

Squash, bacon & Stilton Quiche slice

This quiche is really good hot or cold and half of one of these makes for a really nice lunch with a little salad.

Squash, bacon & Stilton Quiche plate1

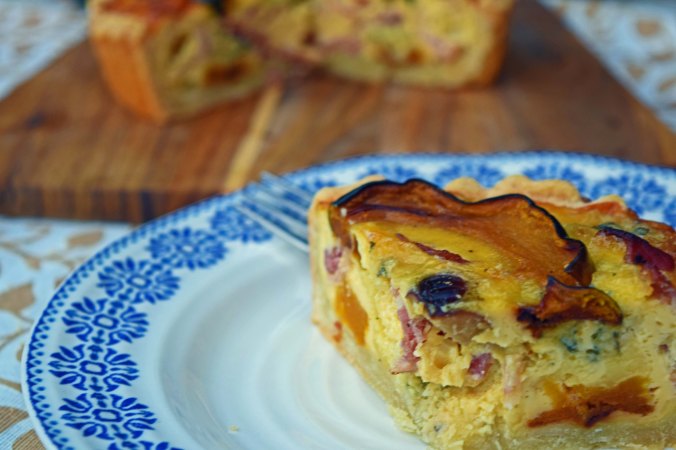
The big autumnal flavours of the quiche make it perfect for an autumn party, picnic, Thanksgiving or Christmas and just the thing for a lunchbox.