There is nothing particularly sophisticated about a cheese ball, but they are so good to eat! I’ve made lots of them over the years as they are super easy to make and use just a few ingredients so you can whip one up in no time at all.
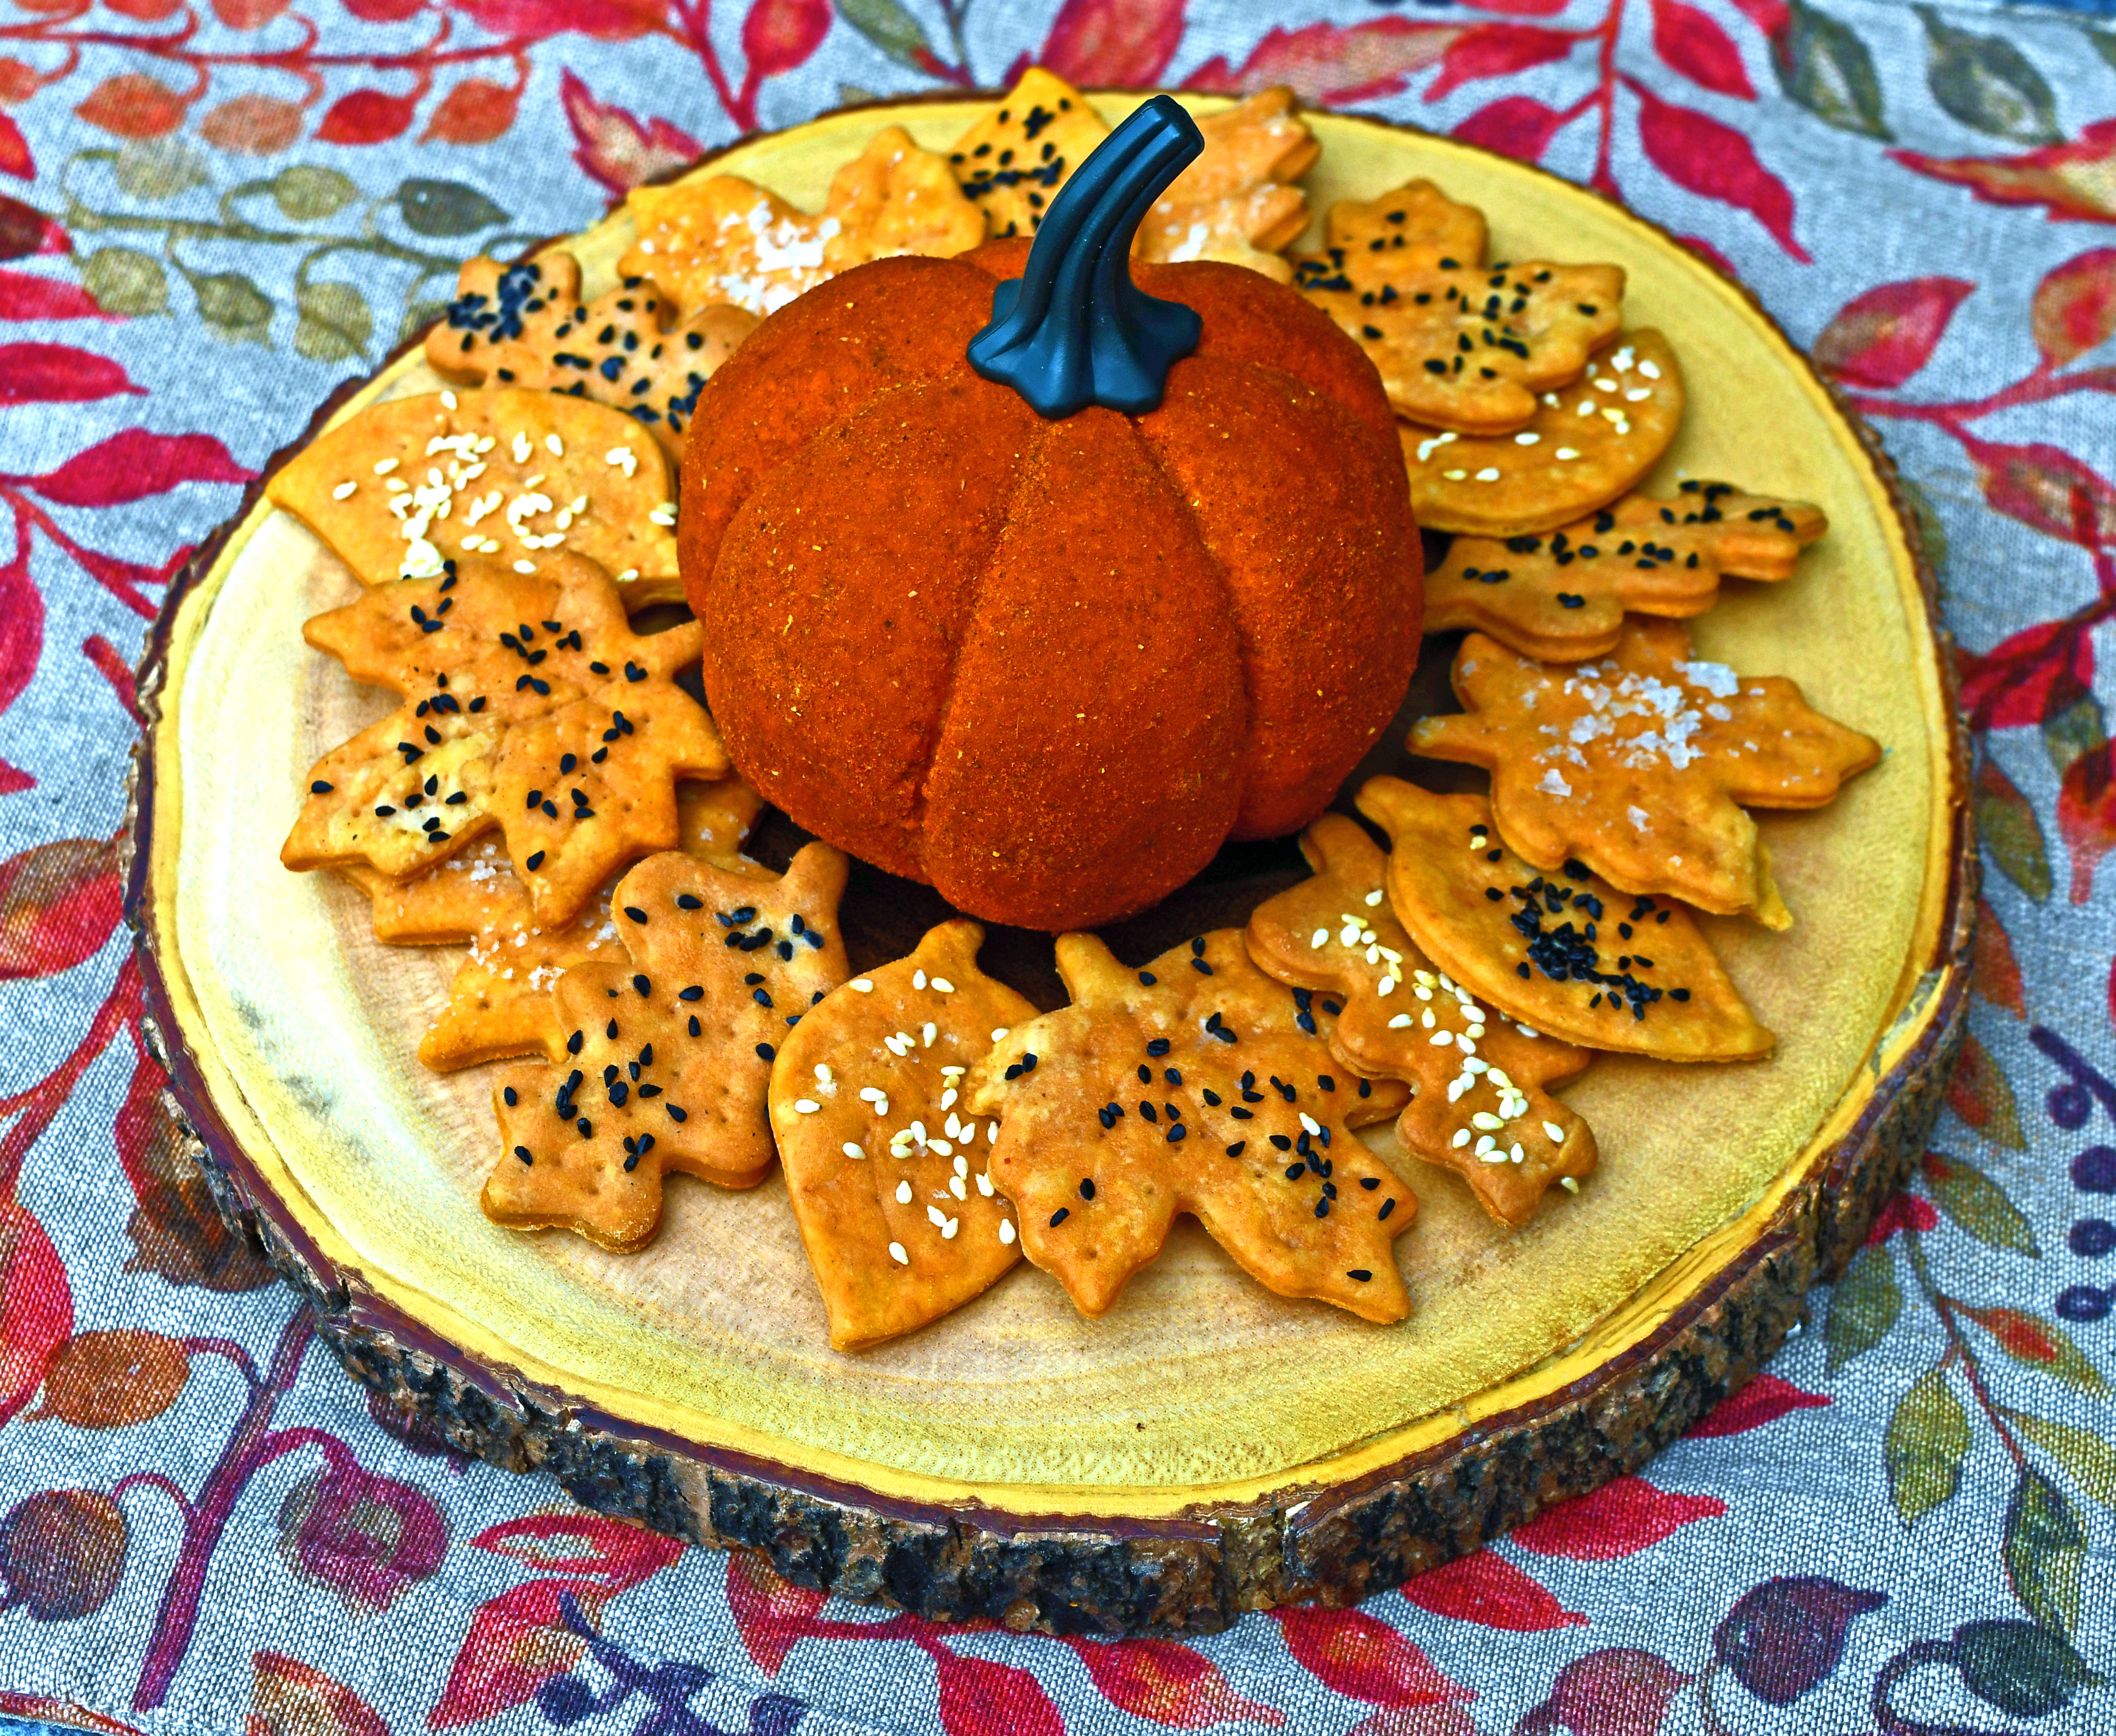
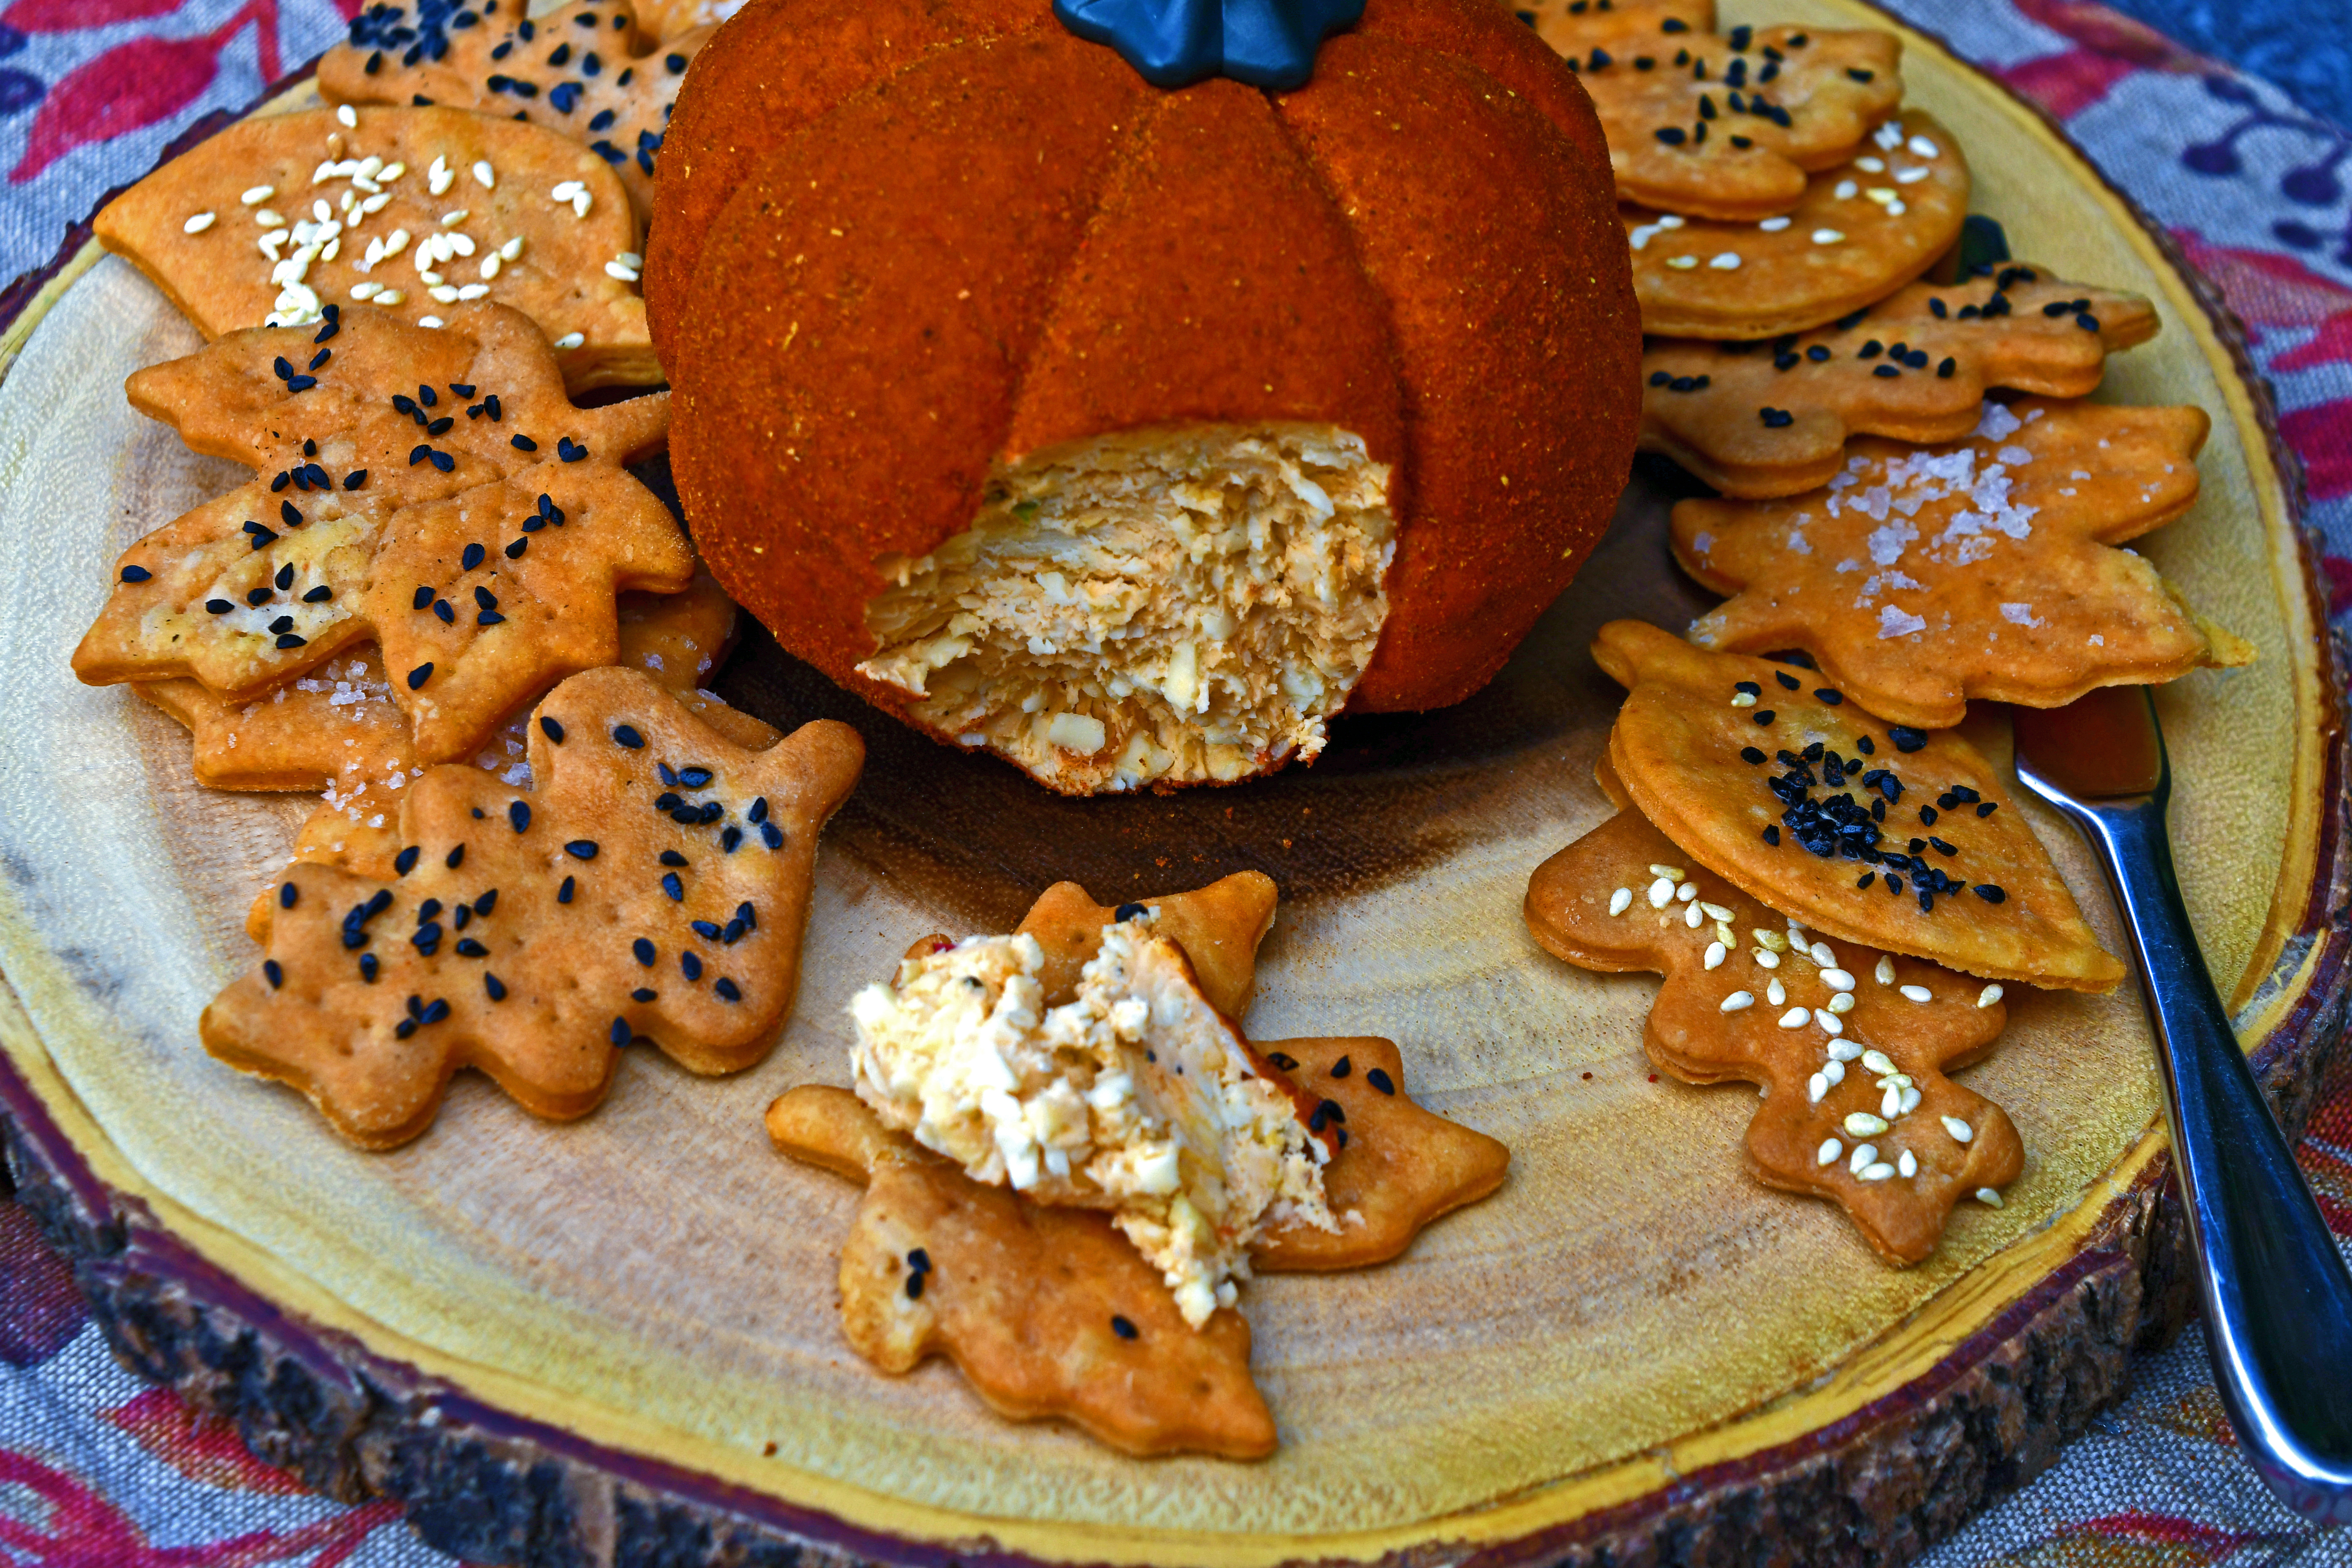
This one is fairly traditional with equal quantities of cream cheese and hard cheese and dusted with spices but shaped into a pumpkin! Great for an autumn party, Halloween or Thanksgiving.
There are a million of these on Pinterest and everyone uses a pepper stalk, but I used one of my faux pumpkin stalks – I knew they would come in useful one day! (My husband thinks I’m a hoarder btw).
A cheese ball will keep for a few days in the fridge, but you can also freeze them. I think they taste at their very best when they are room temperature, so of course they make a great choice for a buffet table.
You can go spicy or non-spicy. I normally put chilli in mine, but just taste your chilli first for heat. I had pretty mild ones here, so put a green and a red one in. I burn the skins of the pepper and chillies over the gas flame and then put them in either a plastic bag, or a bowl, covered by a plate and rub off the skins when cool enough.
Ingredients:
Cream cheese at room temperature – I used a 280g family pack
Grated cheese, I used a mixture of Cheddar, Red Leicester and Double Gloucester, use whatever cheese you have, just use equal quantities of cream cheese and hard cheese
1tbs tomato puree
1-2tsp Dijon mustard
1-2 chillies, grilled and skin removed, finely chopped
1 red bell pepper, grilled and skin removed, finely chopped (reserving the stalk to use to decorate the cheese ball later)
1tsp paprika
1tsp Worcester sauce
Salt and pepper
Coating:
2tbs paprika
1tbs mild curry powder
Method:
Beat everything together with a wooden spoon and check the seasoning.
Form into a ball and wrap with plastic and chill for 30 minutes
When it has had chance to firm up a little, wrap fairly tightly with string (or elastic bands) to form a pumpkin shape before leaving to chill until firm – at least another 30 minutes.

Place the paprika and curry powder into a bowl and mix together.
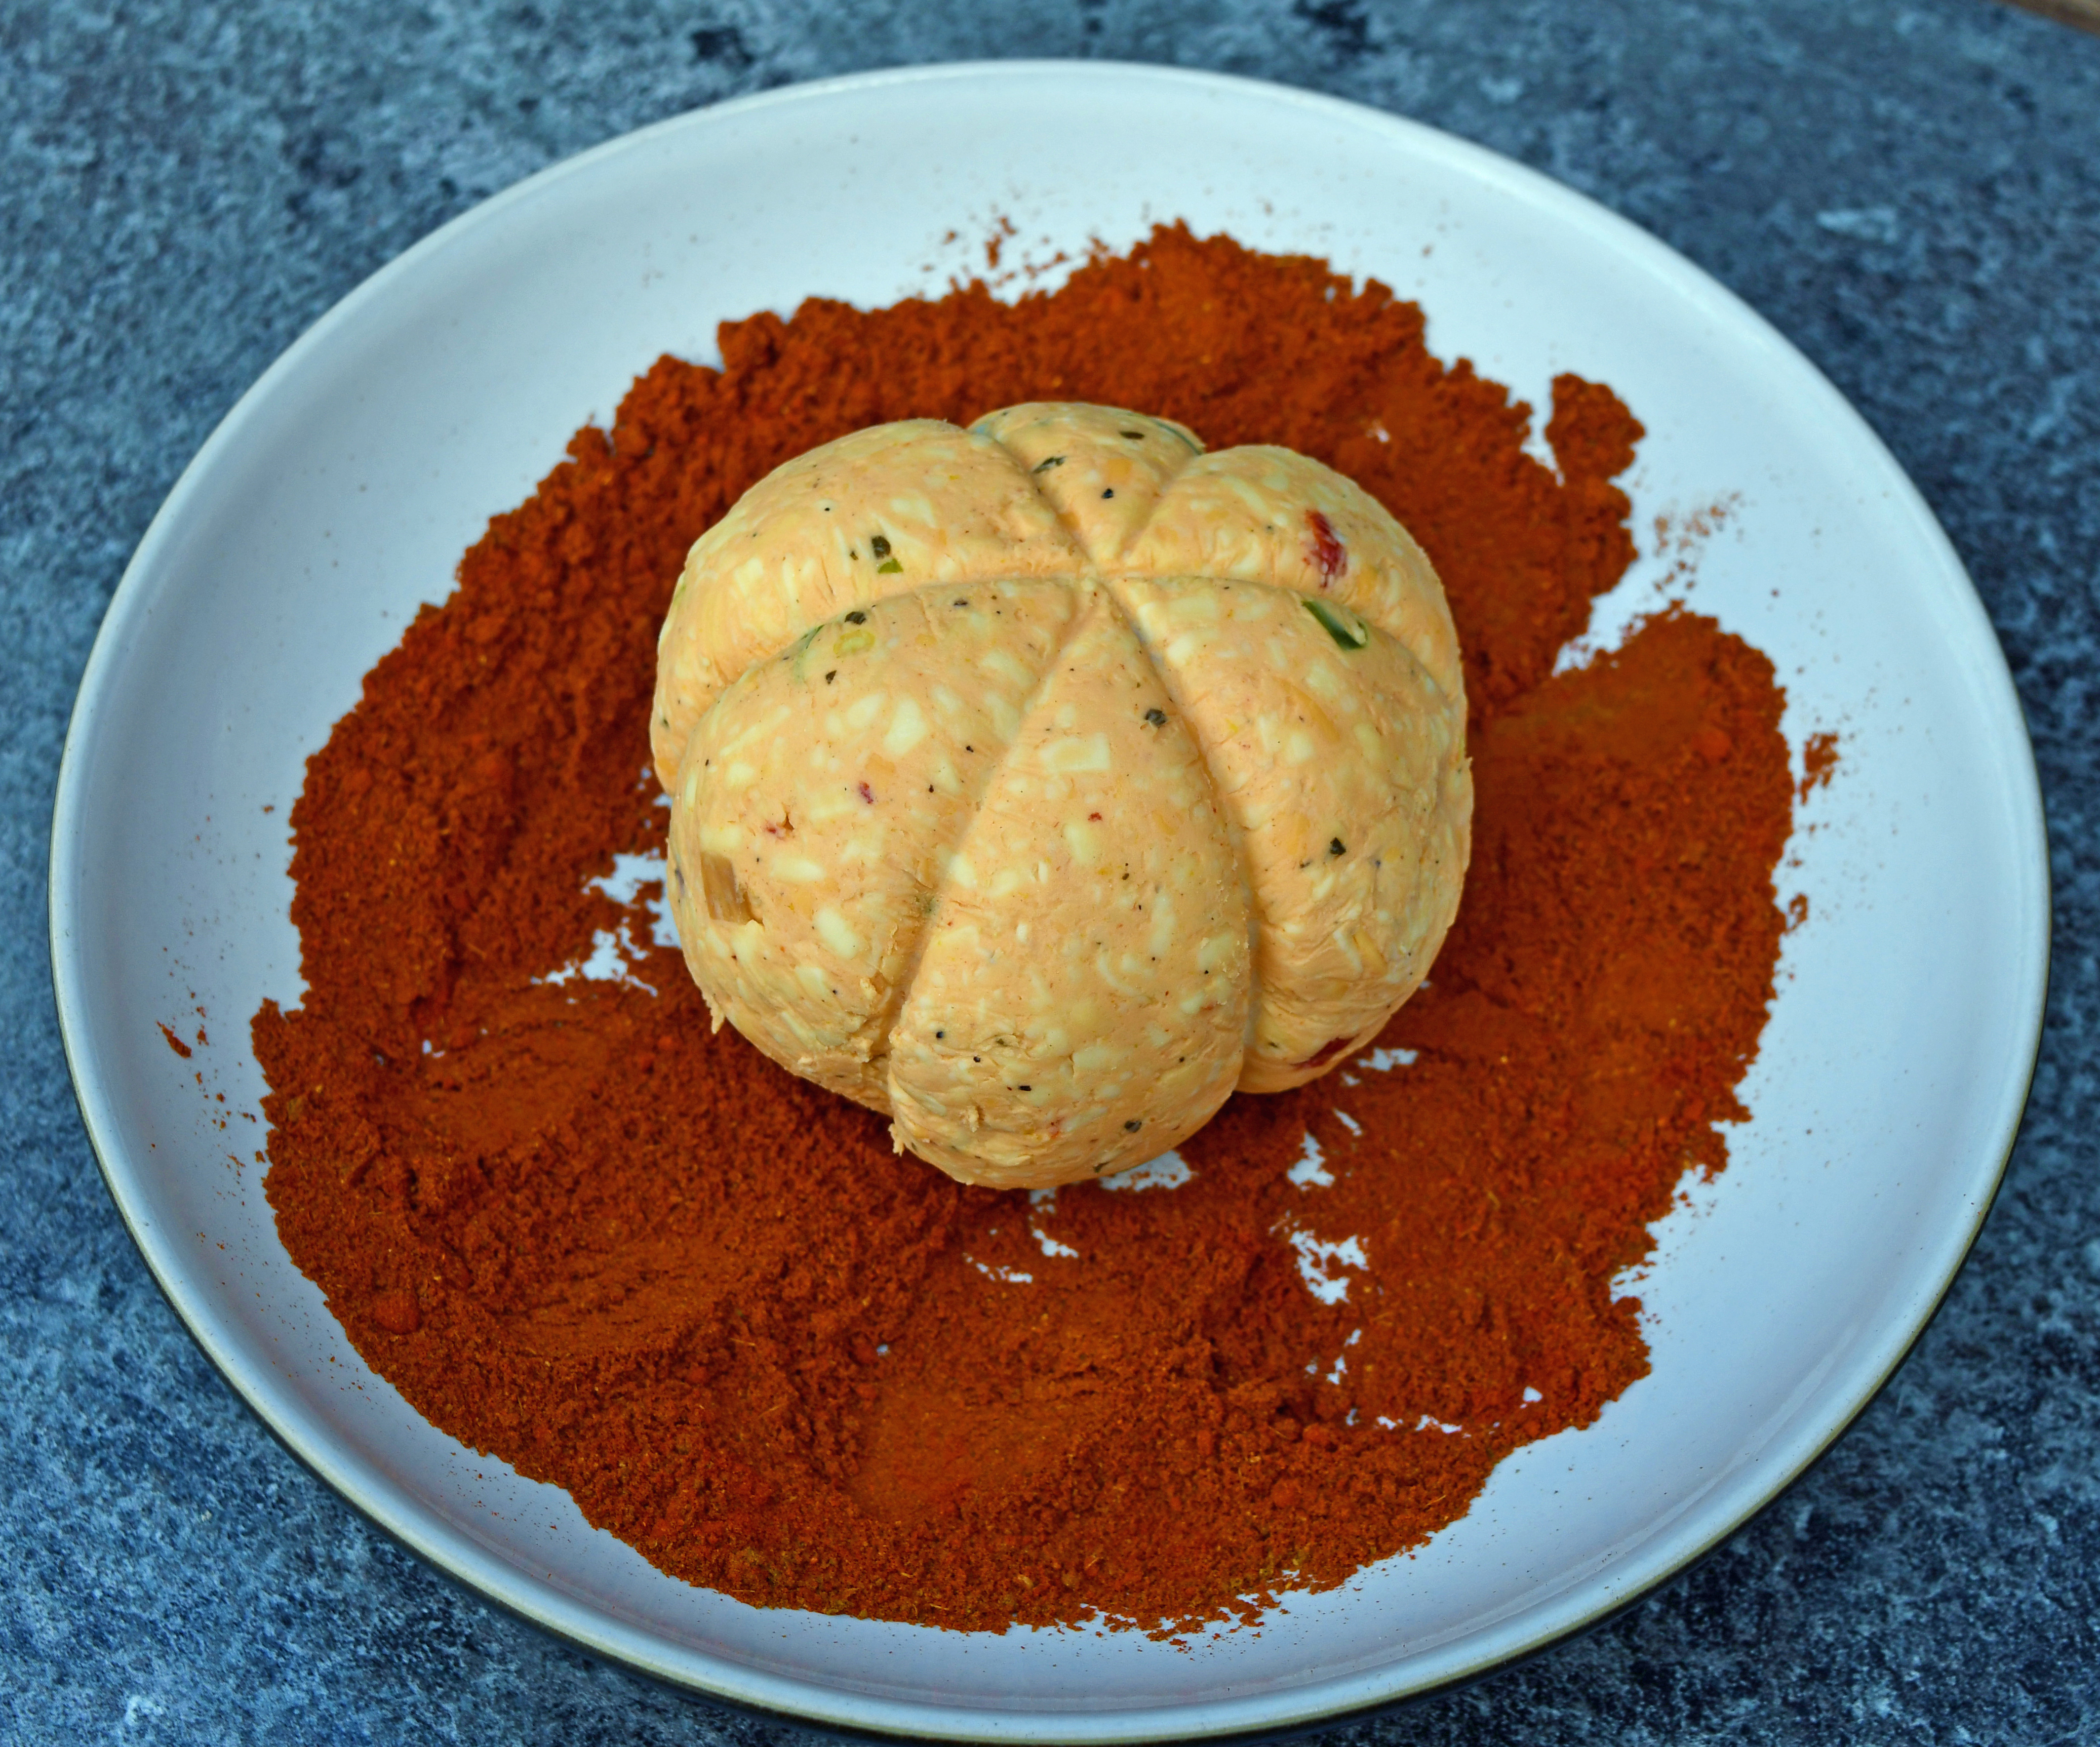
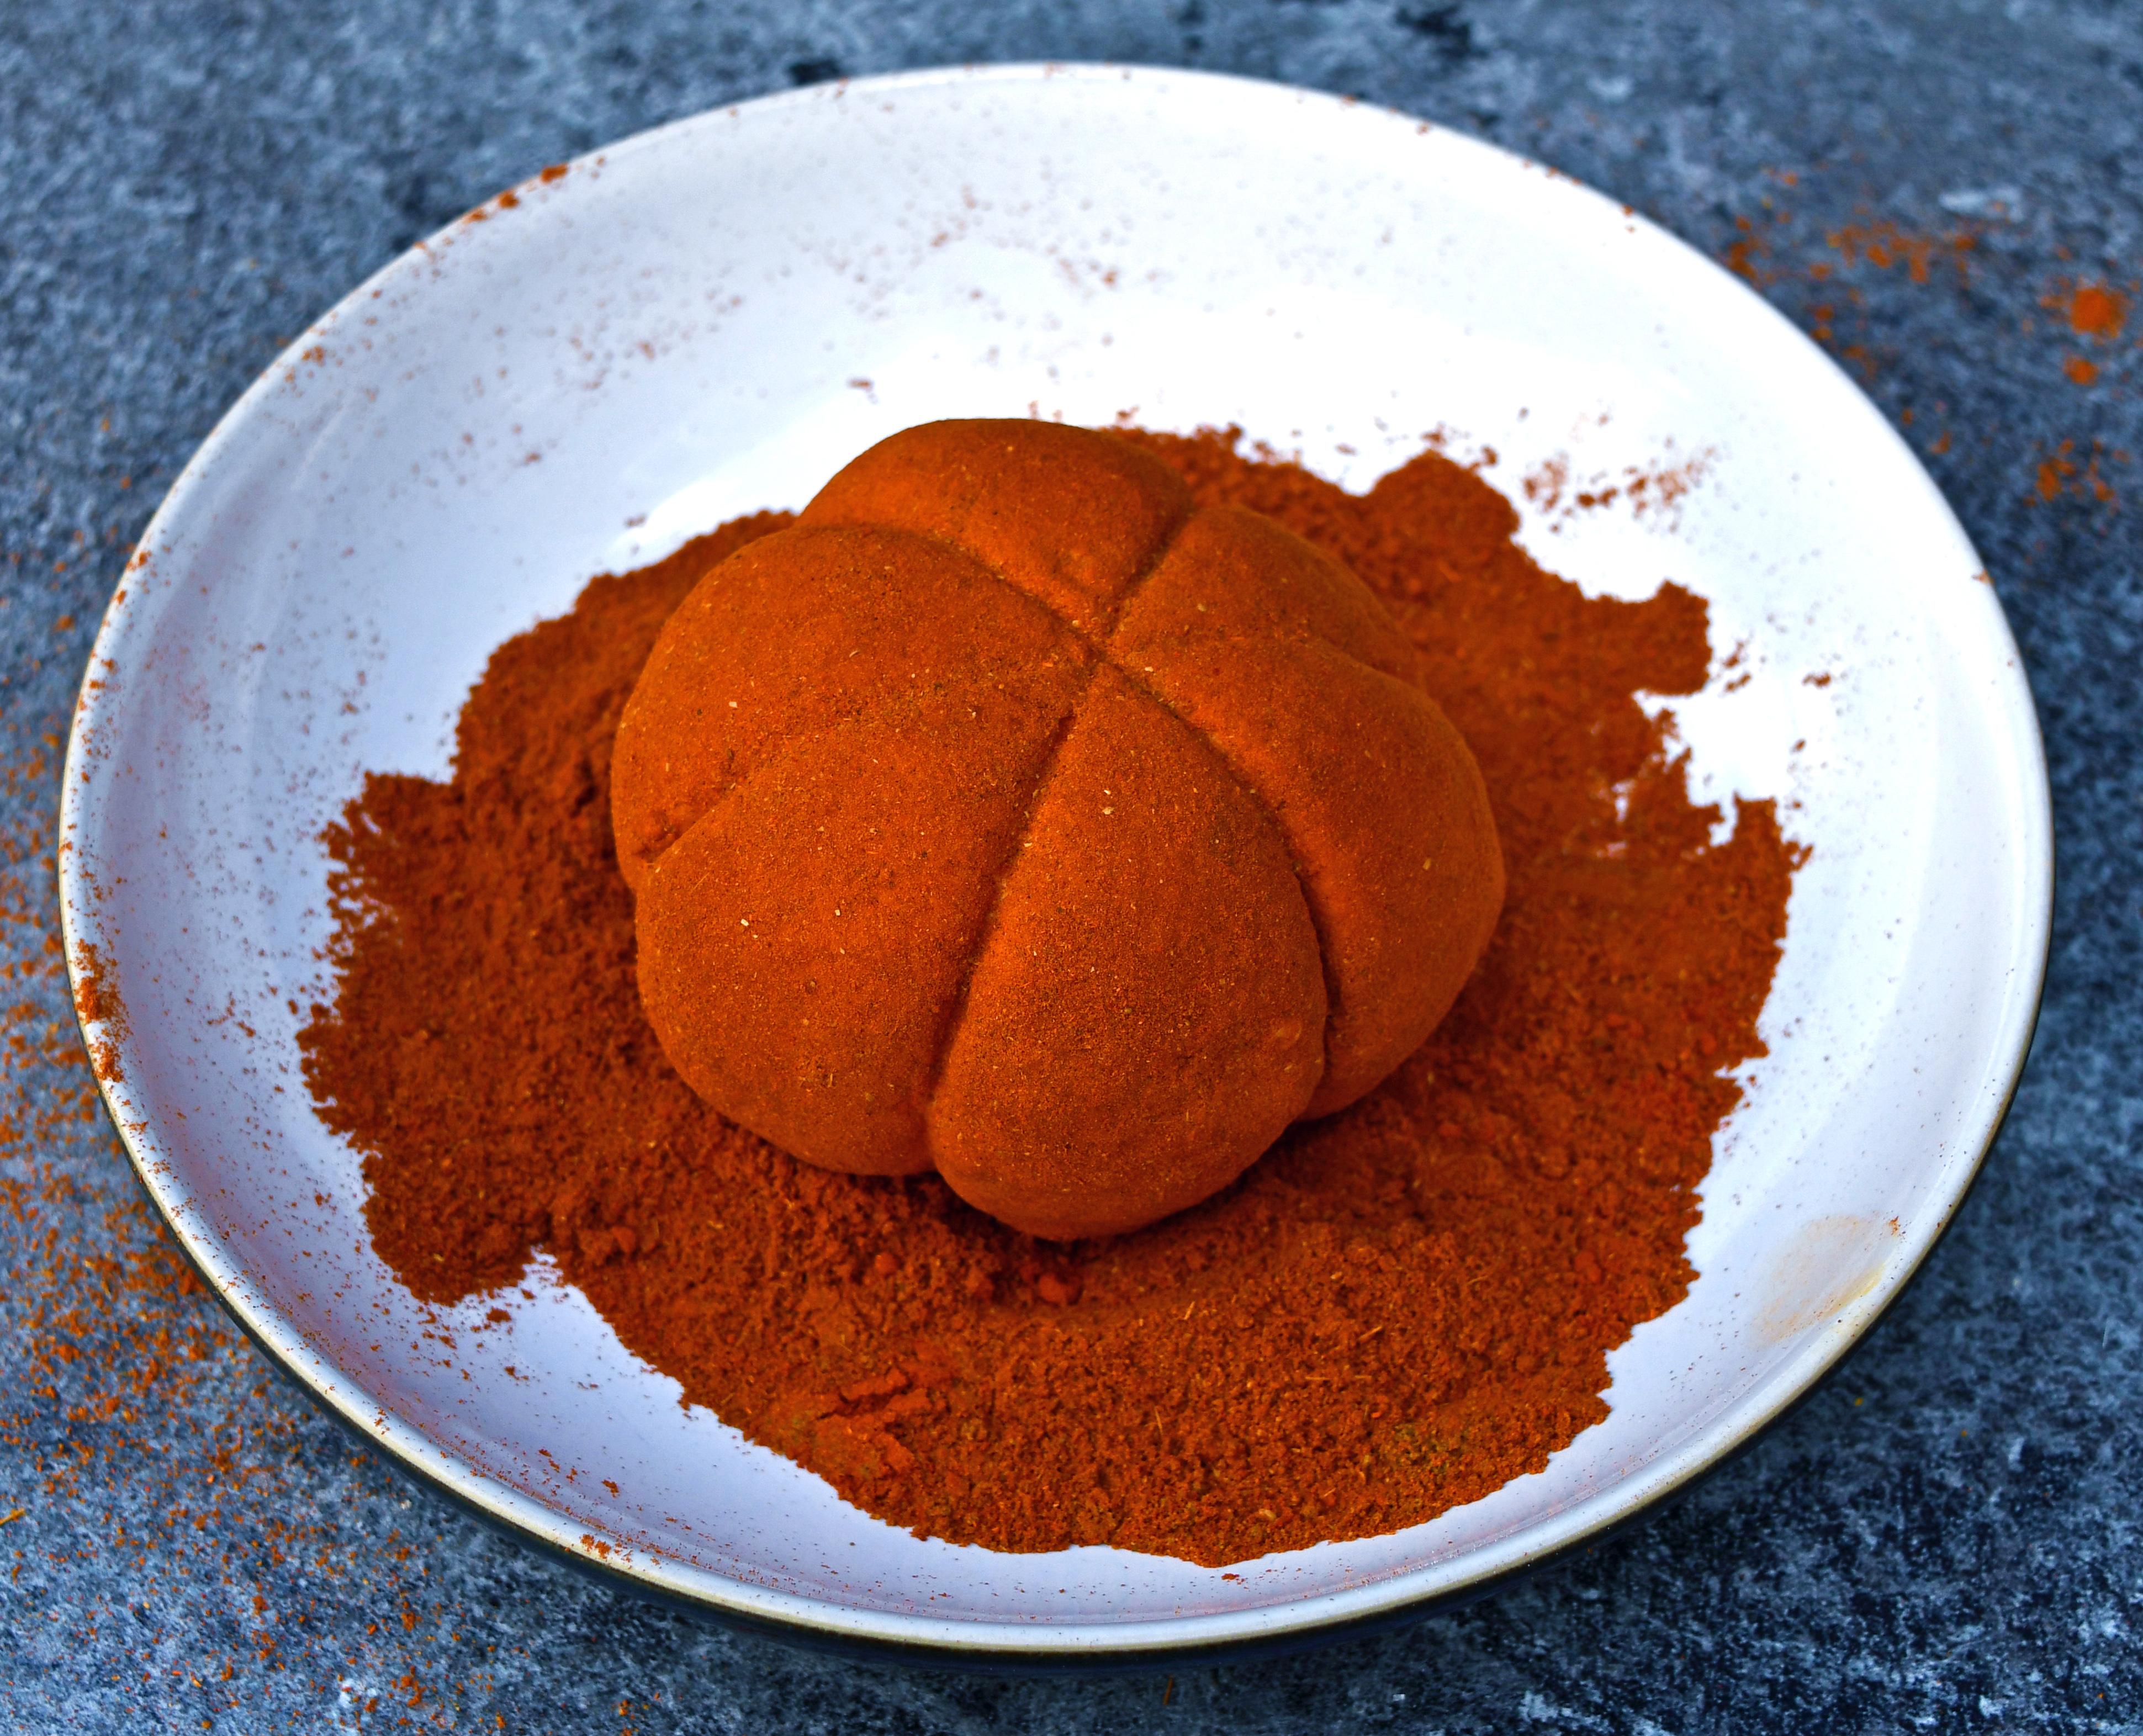
Unwrap the chilled cheese ball and place onto the spices, before dusting with the coating all around and brushing off any excess using a dry pastry brush. The pumpkin is now ready for its stalk – use the stalk from the pepper you grilled earlier (if you don’t happen to have a hoard or faux pumpkin stems!)
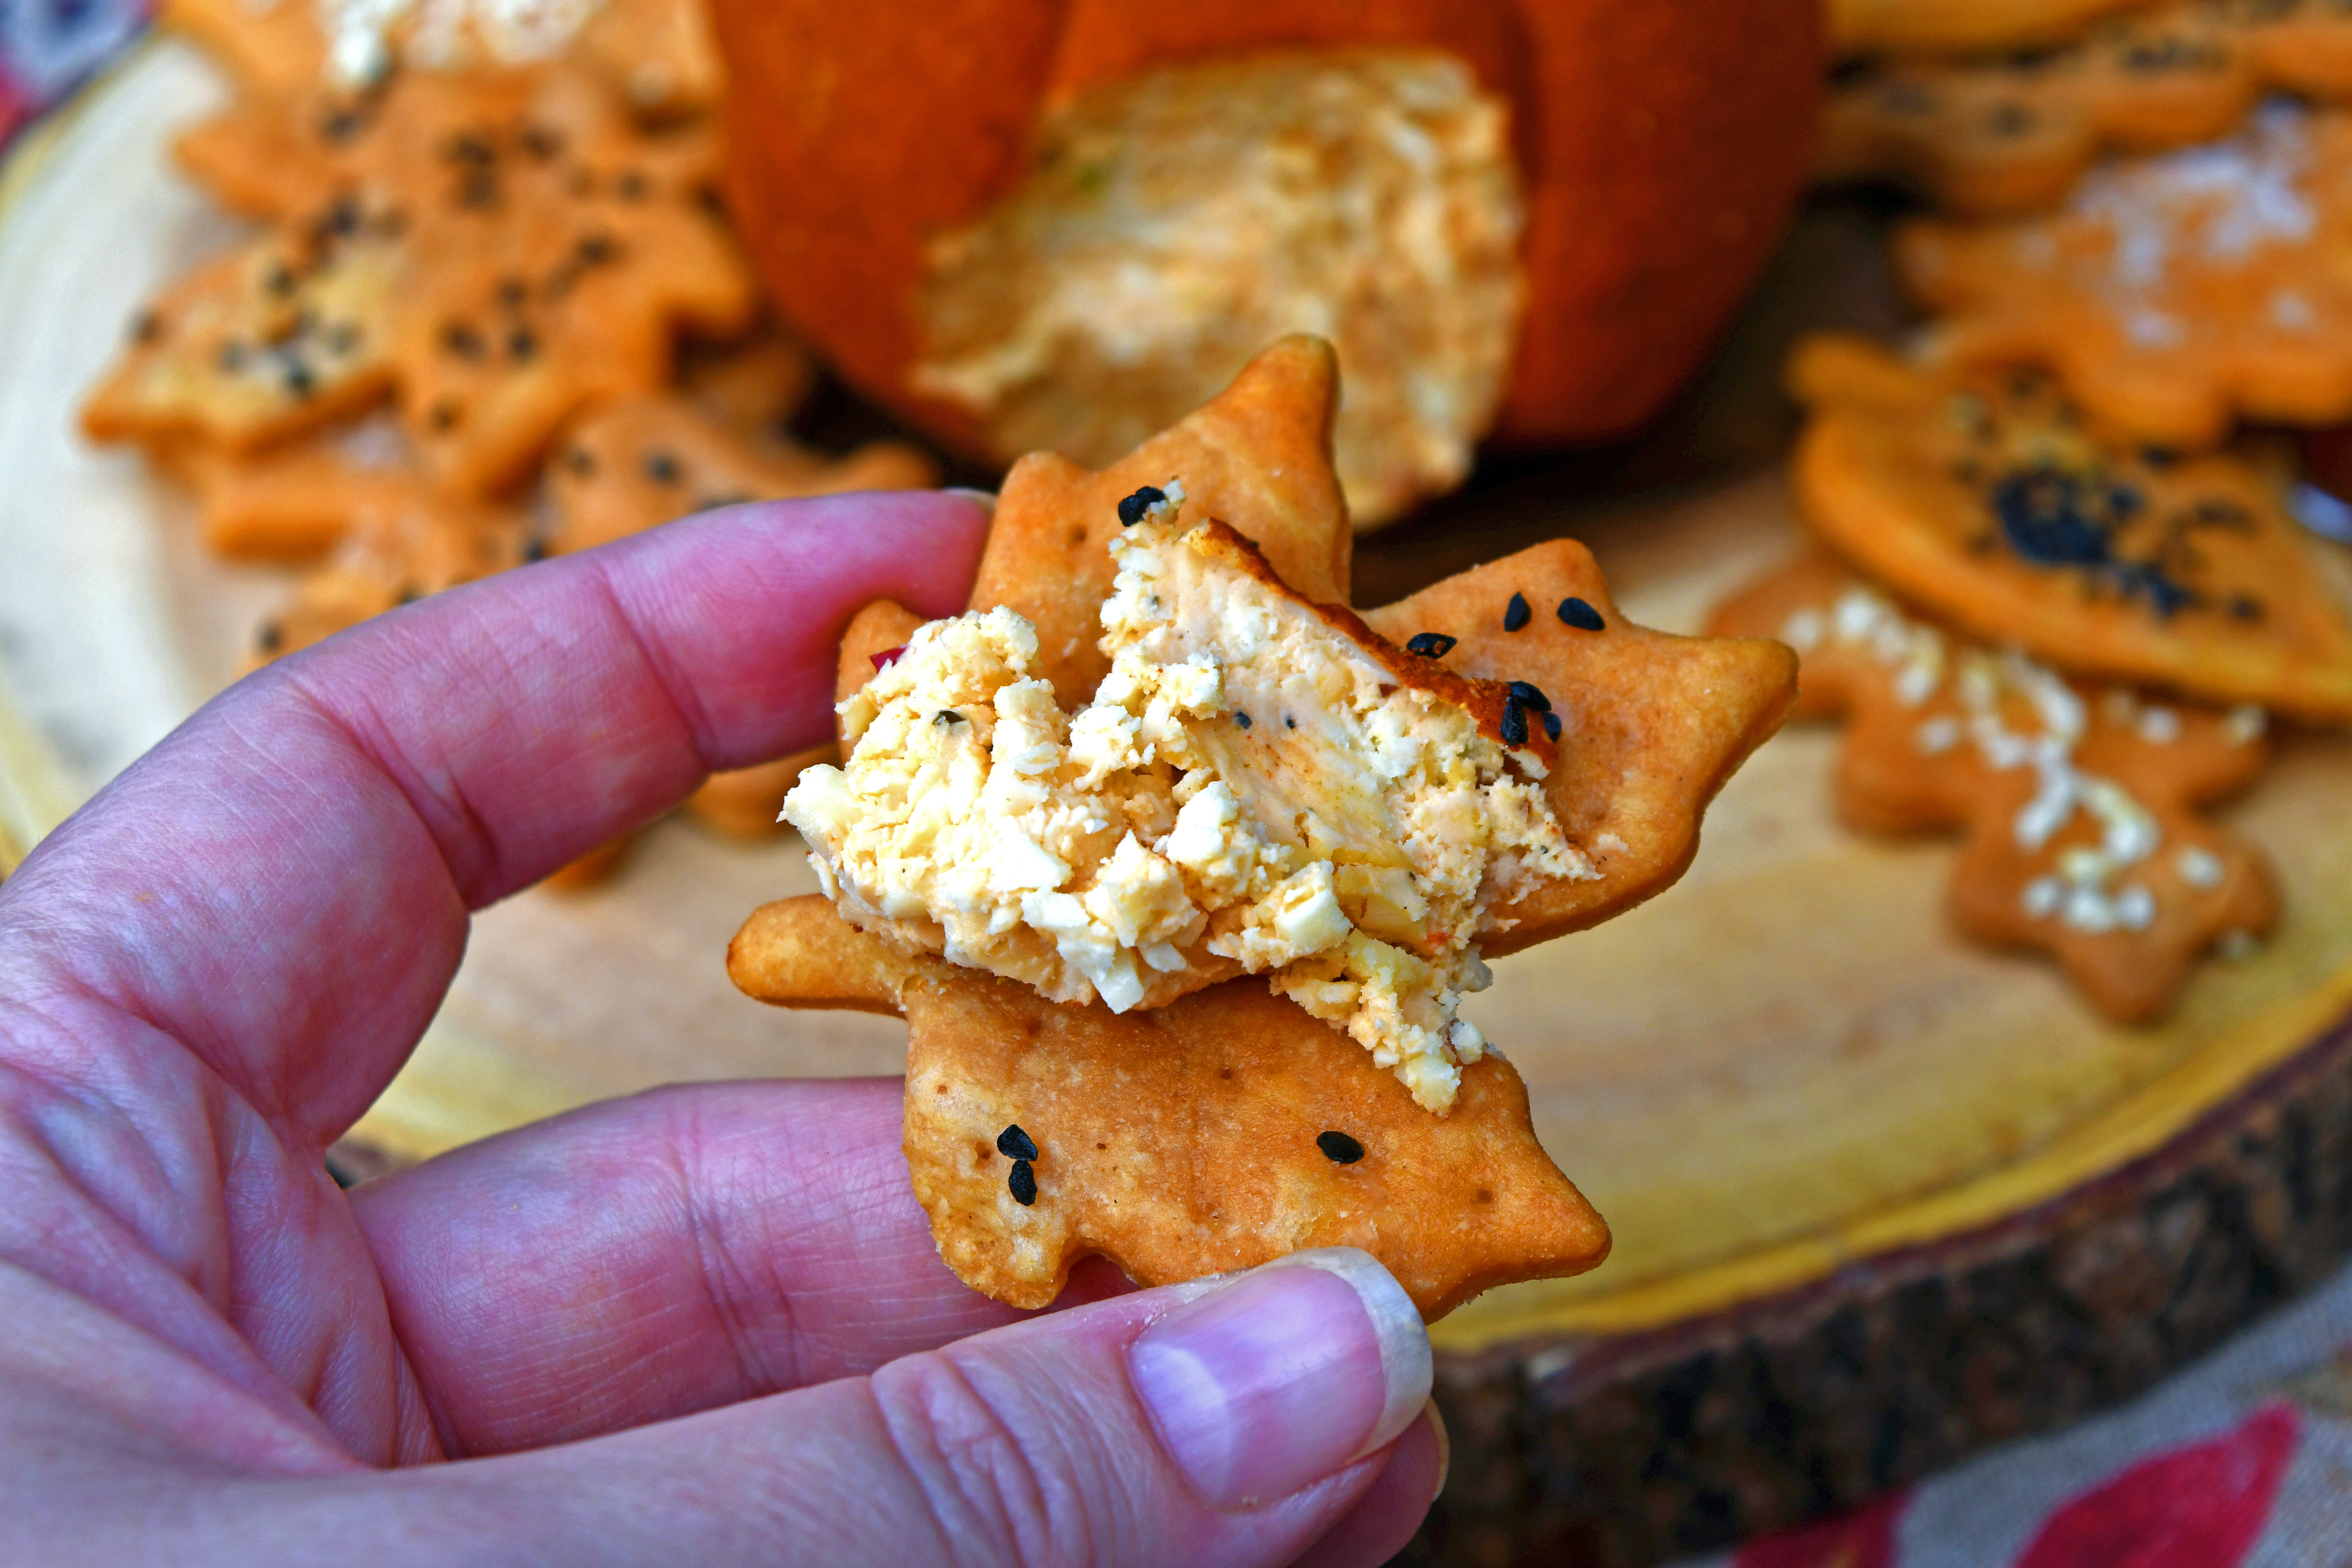
Serve with crudites or crackers, I used my leaf shaped paprika crackers here