Easter Chocolate Bark

Chocolate bark is always a hit in my house, so I had to do an Easter themed recipe.

Easter Bark4

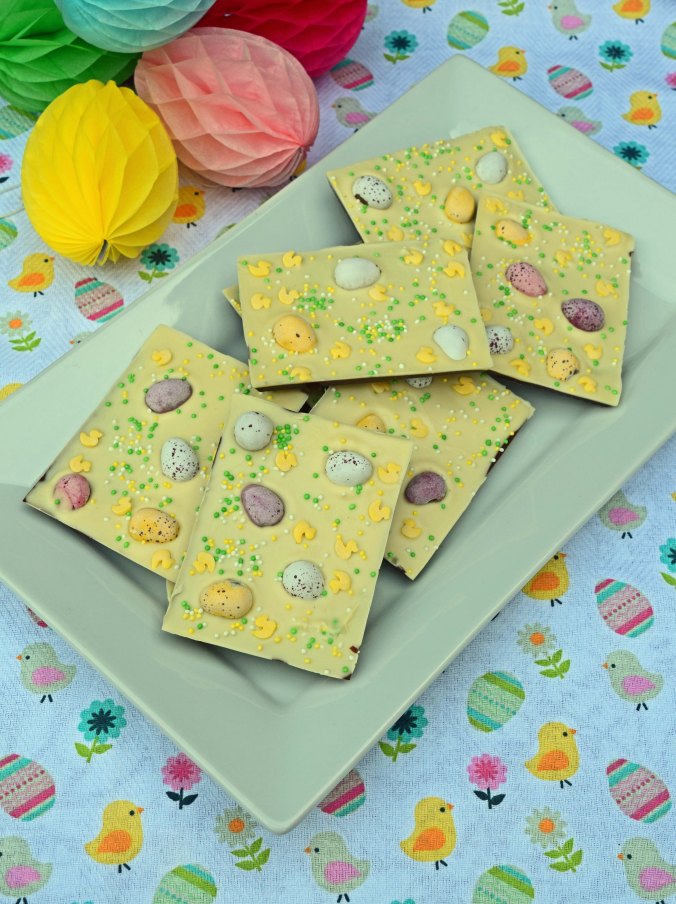
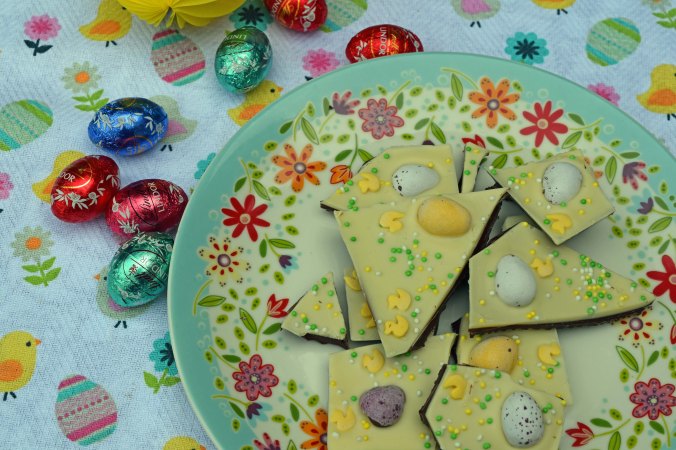
I used my favourite bark silicone moulds to make mine, but it could easily be made in one go and cutting the bark into shards.

Easter Bark3

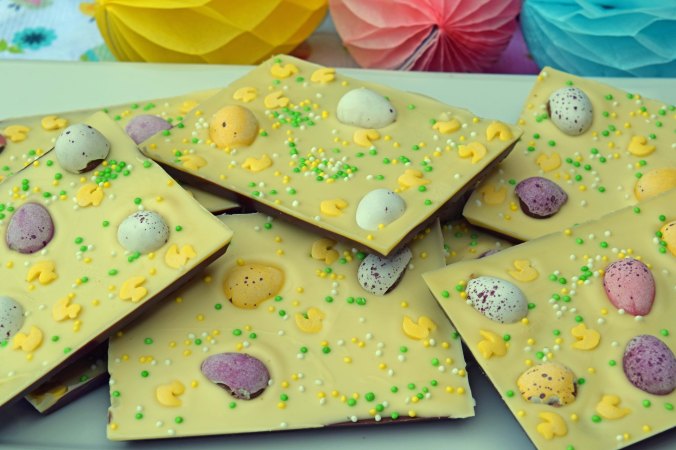
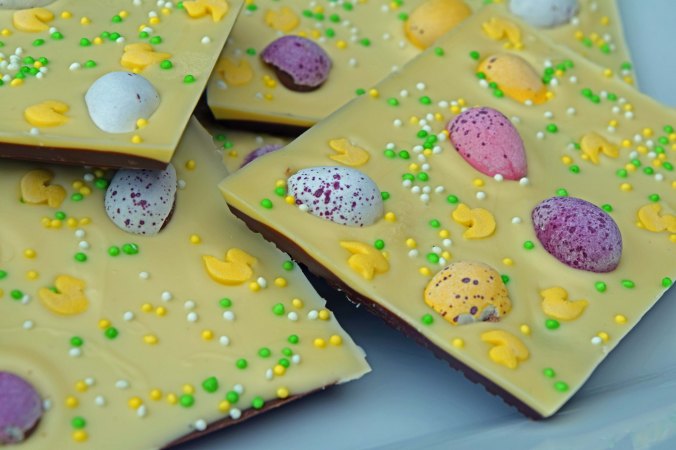
The base is a mixture of two thirds dark chocolate and one third of milk chocolate and then topped with a thin coating of white chocolate.  I always melt chocolate in the microwave nowadays, but some people think the traditional way in a bowl over simmering water is the only way of doing it!  Just take care not to overheat it as it can seize right up – especially the white chocolate.

Easter Bark

Ingredients:
200g good quality dark chocolate
100g good quality milk chocolate
200g good quality white chocolate
Cadbury’s Mini Eggs – broken into halves
Sprinkles – I used FunCakes Spring mix and Ducks

Method:
Break up the dark and milk chocolate into pieces and melt in the microwave.

Pour the chocolate into the moulds, dividing it equally.  Agitate the moulds to make sure the chocolate is nice and level and gets into all the corners.  This also helps eliminate air bubbles.

Leave to set, before melting the white chocolate.  Leave to cool a little before pouring over the dark and milk chocolate layer.

Divide the white chocolate between the moulds, covering the bottom layer.  Agitate the moulds again to level out the top layer.

Easter Bark2

While the white chocolate is still molten, stud with the mini eggs and scatter over the sprinkles.  I prefer to break up the mini eggs as they can be a choking hazard and my little girl is only two.

These are a perfect Easter chocolate treat.

White Chocolate and Oreo Fudge Filled Easter Eggs

These are perfect desserts for Easter. They are definitely only meant for once a year as they are so rich and indulgent. The chocolate eggs have a white chocolate and Oreo cookie fudge filling and are made using silicone moulds that readily available and not too expensive.

Easter Eggs

Ingredients:
Detail on the egg shells:

100g white chocolate, broken into pieces

Egg shells:
100g dark chocolate, broken into pieces
100g milk chocolate, broken into pieces

Egg bases:
50g dark chocolate, broken into pieces
50g milk chocolate, broken into pieces

Filling:
1 397g can of condensed milk
200g white chocolate
1 pack of original Oreo cookies, bashed or chopped up into small pieces

Easter Eggs1

Method:
Melt the white chocolate in the microwave and using a food safe paint brush, load up the brush with chocolate and carefully fill in the detail on the silicone egg moulds. You will either find this therapeutic or get half way through and wonder why on earth you started doing this! Persevere, as the end result really is worth it. Take care to keep inside the lines.

Easter Eggs3

Leave to set completely.

Melt the dark and milk chocolate in the microwave, leave to cool slightly. If it is too warm, it might melt the white chocolate and spoil the detail.

Coat the insides of the egg moulds with the chocolate. I did this by pouring chocolate into each one and tilting and turning the mould until the insides had a good coating. Leave to set completely.

While the shells are setting, make the filling.

Easter Eggs5

Add the condensed milk to a heavy based pan along with the white chocolate and heat until melted, stirring all the time.

When everything is liquid, take off the heat and stir in the cookie rubble. Leave to cool, but not set completely. You need it to be cool enough to not melt the chocolate egg shells.

Easter Eggs2

When the filling is cool, fill the waiting shells and gently press down with the back of a spoon to flatten the filling before adding the rest of the chocolate.

Melt the remaining chocolate and pour onto the waiting eggs, use an offset spatula or palette knife to scrape off the excess and give you a nice flat finish.

Leave to set completely – at least 2 hours and your eggs will be complete.

Easter Eggs6

This recipe would work just as well with the smaller silicone egg moulds you can get as they are super rich.

If I made these again, I would work harder at tempering the chocolate to get a good shine on them, but I don’t think my family noticed the lack of shine when tucking in!

Chocolate Espresso Brownie Bites

These are super fudgy, rich and indulgent little brownies and perfect to serve with coffee.

Espresso brownie bite3

You could cut larger pieces and serve as a dessert with cream, but I think they are best cut into small squares as a little treat with hot coffee.

These are very quick to make and rather than buttering and flouring the tin, I line with foil so there is no problem getting them out – just leave to cool and lift out.

I actually think they are at their best when they have fully cooled and been allowed to stand for a while. If you make them the night before, they will be perfect for coffee the next day.

If you want the full coffee taste, but not the caffeine, you could always use decaf.

Espresso brownie bite4

Ingredients
2 (100g) packs of good quality dark Belgian chocolate, broken into small pieces
120g room temperature butter, plus extra for greasing
2tsp vanilla extract
3 extra-large eggs at room temperature
250g caster sugar
140g plain/all-purpose flour
3tbs good quality cocoa
2.5tbs espresso powder
½tsp salt
50g milk chocolate and chocolate espresso beans or chocolate covered coffee beans to decorate

Method
Pre-heat the oven to 180°C/350°F and prepare a 20cm/8inch square tin by buttering and lining with foil, leaving a little extra either side so you can pull the bake out afterwards. Butter the foil to ensure nothing sticks.  A tin with square corners is best.

Espresso brownie bite2

Melt the dark chocolate and stir in the butter until both are melted, smooth and shiny. I do my melting in the microwave and the residual heat should melt the soft butter, but you might need an extra 10-20 seconds if it’s a very cold day.  Leave to cool a little.

In another bowl, beat the eggs and sugar together, add the vanilla and stir in the melted chocolate and butter mixture. Do not beat, just stir, you don’t want air bubbles in your brownies.

Sieve together the flour, cocoa and salt and gently mix into the wet ingredients until just combined – taking care not to over-mix.

Pour into the prepared tin and give it a few taps to release any air that might be trapped in the mixture.

Espresso brownie bite1

Bake for 35 minutes until the tops are shiny. The centres will be fudgy and moist.

Leave to cool in the tin to firm up, before lifting out and cutting into squares.

If you are decorating, melt the milk chocolate and either spoon or pipe a little onto each brownie and place a chocolate espresso bean onto each one. White chocolate would work well here too.

Espresso brownie bite